34. The code for the training#
You can get the complete code for this training from GitHub.
The backend add-on ploneconf.site
The frontend Volto app volto-ploneconf
The backend add-on is included in the backend setup of Training setup Mastering Plone Development. See chapter Installing the backend.
Further add-ons are build or used while stepping through advanced training chapters. For the sake of completion we are mentioning them here. There is no need to check them out as they are dependencies in backend or frontend. They will be added by name in backend configuration or frontend configuratin, than fetched by building the backend or the frontend.
34.1. The code-packages#
The add-on package ploneconf.site contains the complete backend code for this training excluding exercises.
It is automatically downloaded from GitHub when you run make build in your Plone backend set up from Installation.
The frontend app volto-ploneconf holds the code for the frontend excluding exercises.
As explained in Installation, it is to be installed side by side with the backend in a folder /frontend/.
Optional frontend add-ons are configured here in packages.json.
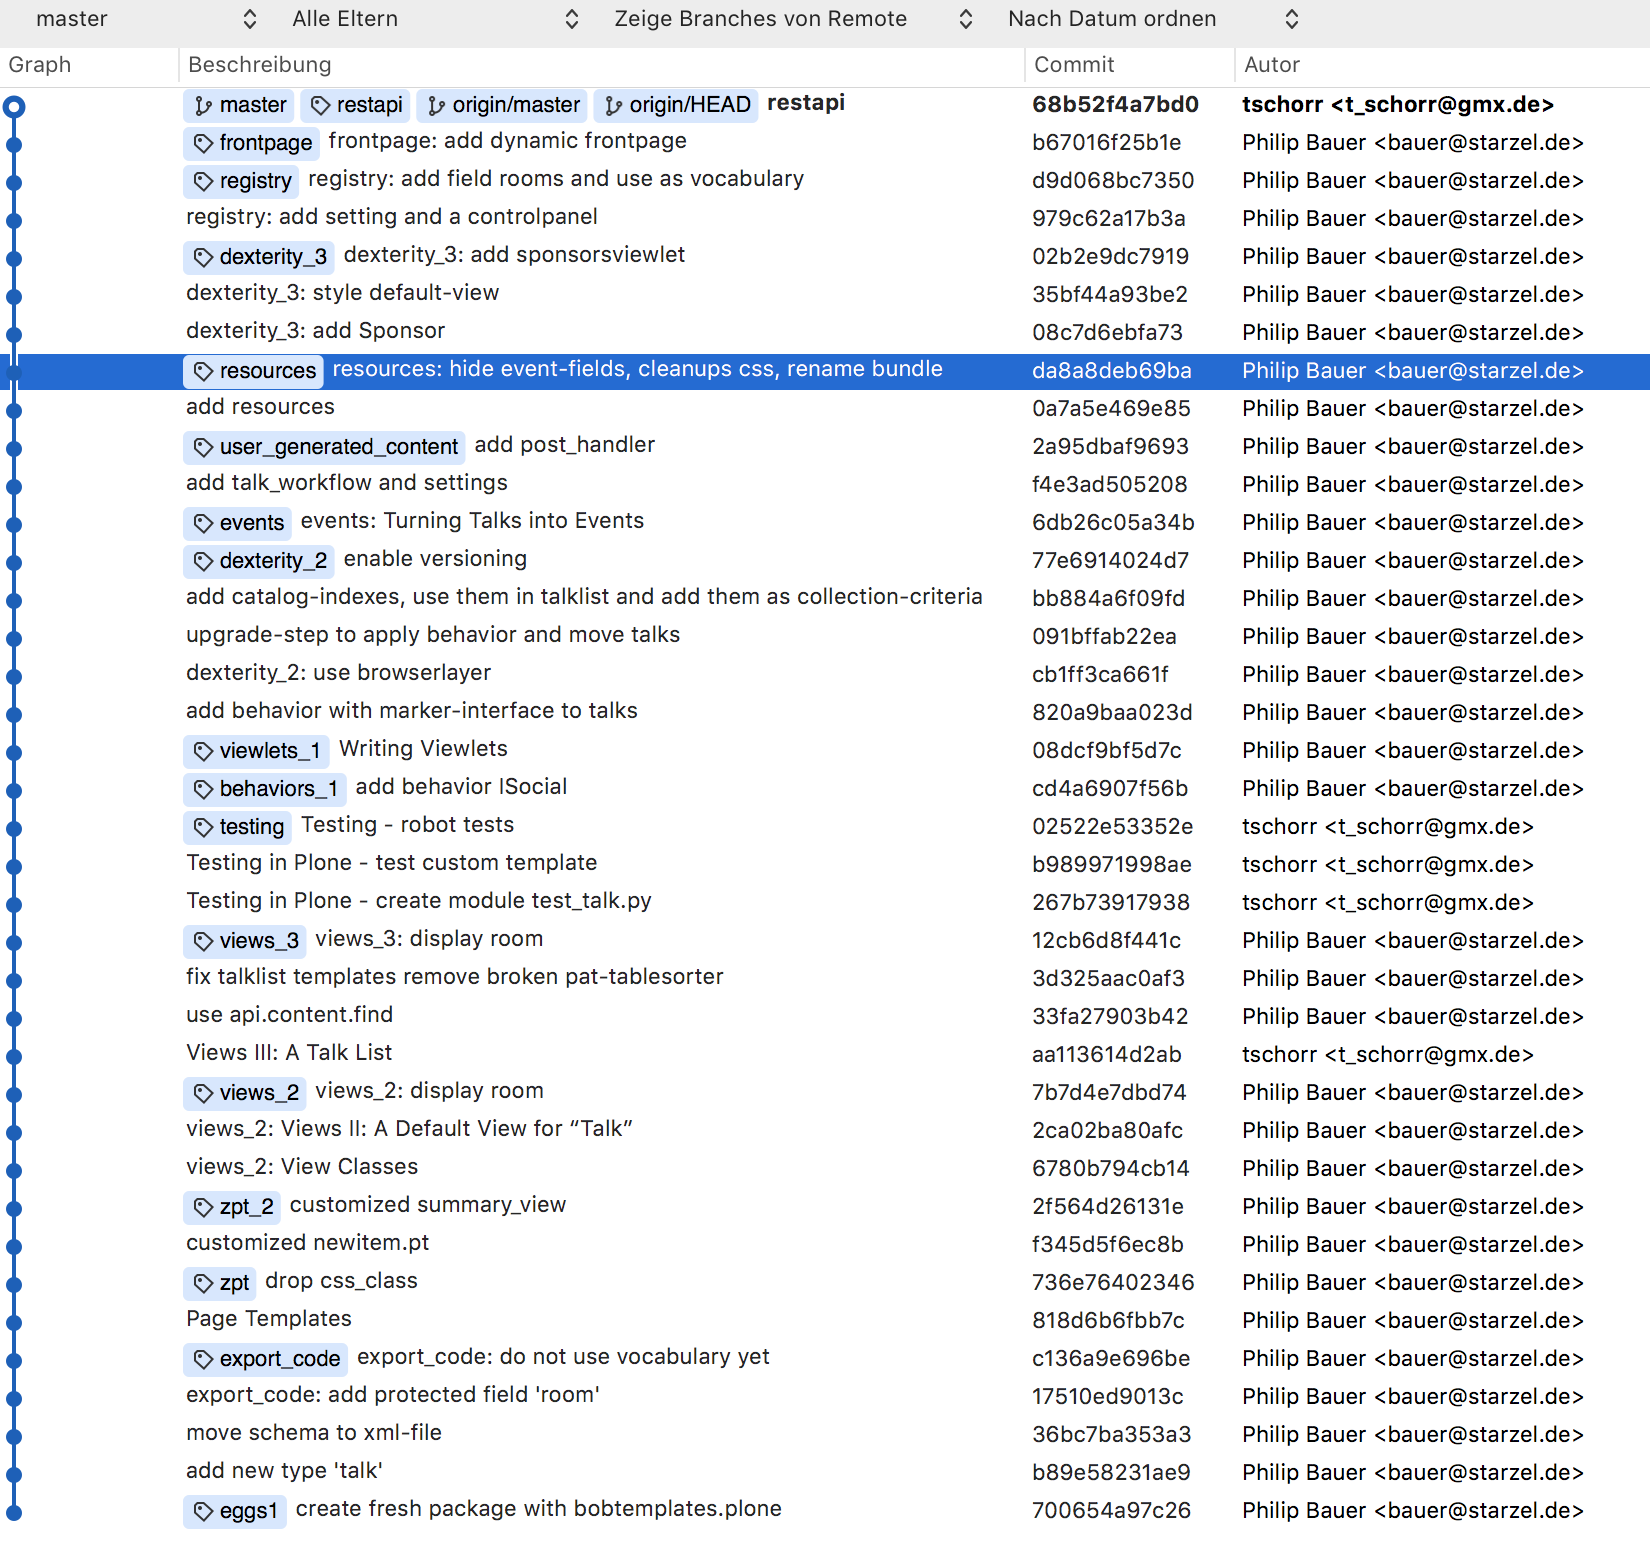
The default branches of these repositories hold the code of the final chapter of the training. Each chapter that adds code to the package has a tag that can be used to get the code for that chapter.
34.2. Getting the code for a certain chapter#
To use the code for a certain chapter you need to checkout the appropriate tag for the chapter. The package will then contain the complete code for that chapter excluding exercises.
If you want to add the code for the chapter yourself you have to checkout the tag of the previous chapter.
Here is an example:
git checkout views_2
The names of the tags are the same as the URL of the chapter.
The tag for the chapter Vocabularies, Registry-Settings and Control Panels is registry.
You can get it with git checkout registry.
34.3. Moving from chapter to chapter#
To change the code to the state of the next chapter checkout the tag for the next chapter:
git checkout views_3
If you made any changes to the code you have to get them out of the way first. This involves two things.
Warning
Make sure you have no new files or changes in the folder structure of ploneconf.site that you want to keep because the following will delete them!!!
git clean -fd
git stash
This does two things:
It deletes any files that you added and are not part of the package.
It will move away changes to files that are part of the package but not delete them. You can get them back later. You should learn about the command git stash before you try to reapply stashed changes.
34.5. Updating the code-package#
This section is for trainers who want to update the code after changing something in the training documentation.
The current model uses only one branch of commits and maintains the integrity through rebases.
It goes like this:
Only one branch (main)
Write the code for chapter 1 and commit.
Write the code for chapter 2 and commit.
Add the code for chapter 3 and commit.
You realize that something is wrong in chapter 1.
You branch off at the commit id for chapter 1.
git checkout -b temp 123456You change the code and do a commit.
git commit -am 'Changed foo to also do bar'Switch to master and rebase on the branch holding the fix which will inject the new commit into master at the right place:
git checkout mastergit rebase tempThat inserts the changes into master in the right place. You only maintain a master branch that is a sequence of commits.Then you need to update your chapter-docs to point to the corresponding commit ids:
chapter one:
git checkout 121431243chapter two:
git checkout 498102980
Additionally you can
set tags on the respective commits and move these tags. This way the docs do not need to be changed when the code changes.
squash the commits between the chapters to every chapter is one commit.
To move tags after changes you do:
Move a to another commit:
git tag -a <tagname> <commithash> -fMove the tag on the server
git push --tags -f
The final result should look like this:
